LE Designs Blog Monthly Events

LE Designs Blog Monthly Events
1st Thursday of the month - A review of a craft product
2nd Thursday of the month - Craft room inspiration
3rd Thursday of the month - Stamp set/die cutter review
4th Thursday of the month - A craft room storage idea
Any 5th Thursday in a month - *GIVEAWAY*

Sunday 25 May 2014

Launch of cards for sale

Good evening all,

I hope you are all well. I am delighted to announce that my first collection of cards are now available for sale on Etsy!! I am really hoping to make a career from making cards, especially once my toddler goes to nursery after the summer holidays.

My collection of 8 cards are as below.


They are all available from my Etsy shop found here.

Tuesday 20 May 2014

A fully sketched then water coloured card!!

Well, unfortunately it is time for the Watercolour for Card Maker's course to end….all good things must come to an end so they say. This has been a truly amazing and inspirational class and I would recommend it to all card makers. I have learned SO much on this course and I feel that adding watercolour to a card takes it to a whole new level.

We have learned many techniques, including how to 'fake' watercolour, but the course has built up to this point - free hand sketching and then water colouring. I never thought in a million years that I would be able to do this, but I have. It is not brilliant, but you can recognise what the animal is!!! I am very pleased with it and love the effect I achieved by once again adding perfect pearls in a localised area in order to get a shimmering effect on the head/neck.

Anyway, here it is…….


I am surprised at how much I enjoyed painting this duck and how confident I felt at mixing colours in my palette and just 'knowing' which colours to mix together in order to achieve the colour I wanted. Isn't it amazing what a difference just a couple of weeks can make.

I would like to say a HUGE thank you to all the teachers on this course. They were all amazing and are so very talented and inspirational. I will definitely be putting all my knew acquired skills to use.

As always, comments are so very much appreciated. Many thanks for taking a look xxx

Thursday 15 May 2014

Watercolour class day 9 - Freehand painting…..aaaahhhhh!!!

Yes, I am back with more cards and this time it is time to get serious - no templates, no stencils, no stamps, no faux hand painting - genuine free as a bird hand painting!! Those words struck the fear of God in to me, but then I went in to class with an open mind and I was pleasantly surprised!!

We were shown three different card techniques and I;m going to be honest, if not a bit cheeky here. The first card I LOVED, but the second and third just weren't really my 'style' if that makes sense. I know I probably should give the ideas a try at some point, but I decided instead just to focus on the first card. I made it last night and just fell in love with it - so much so, that I made another two using the same technique this morning!!

I am here therefore to share with you three cards, using the same technique, creating the same picture, using the same layout, but each oh so different…….

So here we go, here is card number one - I have decided to give this card instead of the one I made yesterday to my friend whose birthday it is tomorrow…


As you can see, it is a free form, multilayered, multi coloured tree. I decided to finish it off by adding a bit of bling (you know I LOVE my bling) by way of some co-ordinating sequins. 

Now, I was in love with this card….I actually sat it on my mantlepiece last night and just kept looking at it in admiration….but then last night I was pondering and wondered if I could do the same thing, but in much more autumnal colours and maybe add buttons in order to make a Father's Day card for my Dad…..It's not Father's day until June for us in the UK but it's always good to be organised!!

So this morning I set to work. I still added some green to the tree, but I made sure I set this down first to give just a hint of remaining greenery and then focussed on layering over browns, reds and then finally, oranges. Oh, I am so impressed….


I much prefer my tree trunk on this one - I think it is the darkness of it. I'm a bit unsure about the branches on both cards though - Definitely need to work on them. 

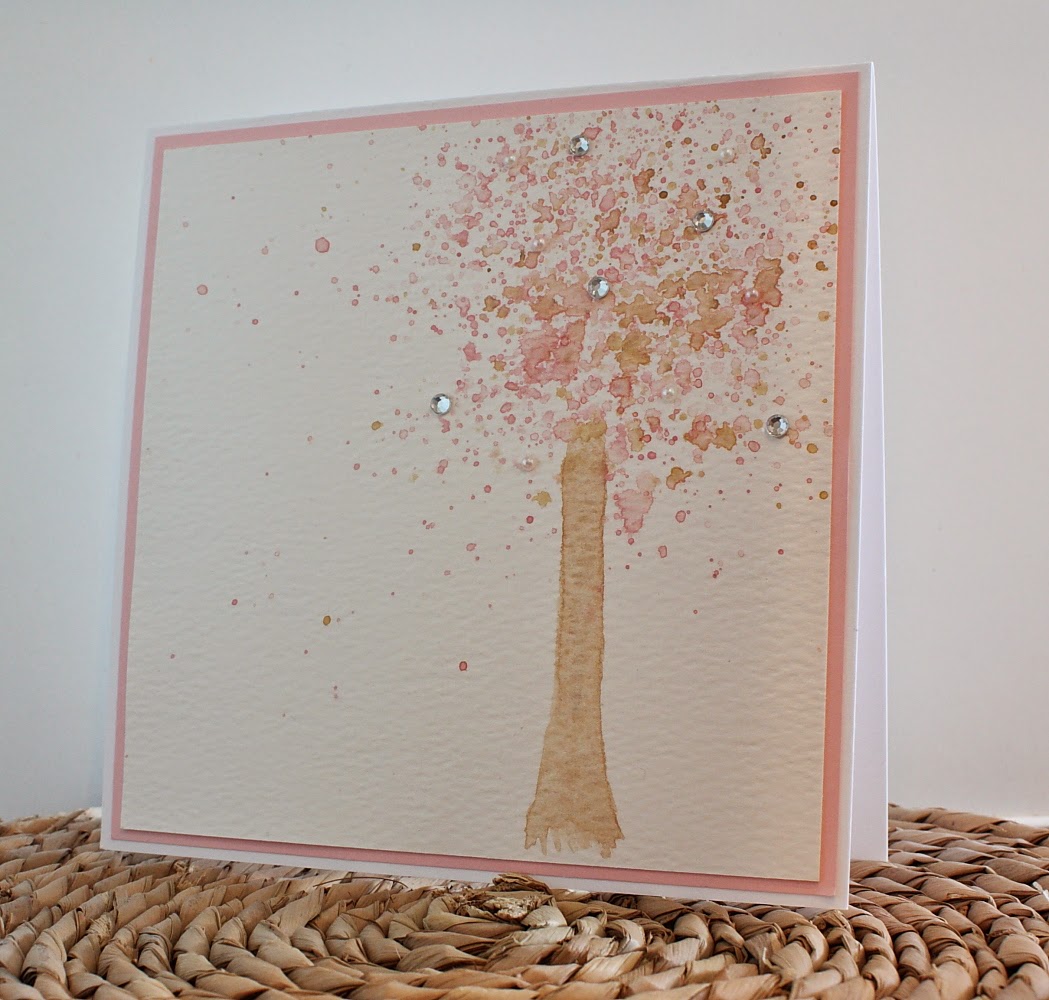
An hour or so later, I then had more time to ponder……would't this be great in fawn, pale pink and gold shimmery colours with some crystals and pearls added for acting as a Wedding card or in my case, as I am going to use it as a Wedding Acceptance card….

Here is the reality of the pondering.


I only had 3mm pearls which I think perhaps are on the small side and pretty hard to pick out. I never added branches this time - I'm not sure if this looks better or worse?!

As you can see, I've had to do a makeshift photo location again today. Life with a soon to be 3 year old is just so manic!!

This card was SUPER easy to do but I think the results are utterly stunning.

I have decided to call this card 'Tree of Life' because I feel it is so versatile and can be suited to many life events by just simply tweaking the colours used.

I used my proper 'tube' watercolours again for these cards and I just find them amazing.

As always, any comments so very much appreciated. xxx


Wednesday 14 May 2014

Watercolour day 8 - more faux hand painting.

Today was all about more techniques to create the illusion that a painting has been hand drawn/painted from scratch. I was really desperate to try the techniques mentioned and am really happy with the results.

First is the stunning Chrysanthemum from Uniko Studio (this actually just has to be my favourite stamp collection).

This Chrysanthemum is in fact painted petal by petal (it took AGES). I then decided once it was dry that it would look lovely with a nice glittery effect to it. I therefore painted a layer of water over the top, mixed with white Perfect Pearls. I wanted to create a picture frame around the flower so I die cut and then trimmed around the edges two squares. I attached one directly on the the watercolour paper and then mounted the other on top using foam pads. I really like the result of this. I spent ages deciding what my backing card should be - a block colour didn't look right and white was too stark so I decided to mix gold perfect pearls with water and created paint splashes all over the panel. Again, there was something not quite right, so I added some pink watercolour paint splashes too which tied in nicely with the colour of the flower. Once dried and assembled, the sentiment was added and of course some bling by way of small sequins in pink and gold and some pearls in pale pink. Viola. I have tried to capture the sheen on the flower which I think I have managed to pick up on camera! My photo location isn't great - usually go to my summerhouse in the garden, but my little boy getting up to mischief today and so I had to just make do with photographing in the kitchen!!


My second card uses the negative of a die cut as a template for some free hand painting. I previously used this snowdrop stamp on an Easter card, but my husband very kindly (!!!) told me that it looked more of a sympathy card. I can kind of see his point actually and certainly, once I had finished painting the below card, it naturally developed in to a sympathy card. This is the first time that I have properly used the tubes of paint I inherited. Whilst they are a bit more of a faff than just using paint pans out a set, or using pencils, I actually much preferred them. The colours were much easier to dilute to the tones I wanted I felt.

Here is my card - 


When photographing this card (although again it is not in my preferred location), I decided to take the advice from a recent post from Debby Hughes, where she talks about how she goes about positioning her cards for photographing. She explained that tilting the card allows much more detail to be seen, but tilting it too much right or left, makes the card seem as though it is only intended for the person standing on the right or left…..by just tilting it ever so slightly, you capture the best of both worlds. I think she is absolutely right!!! Thank you so much Debby - I will be doing this from now on!!!!!

Many thanks for taking a look and as always, and comments are so much appreciated xx


Tuesday 13 May 2014

Watercolour class day 7…..faking it!!

Today's lessons were all about faking it! We were using stamps and watercolours to create the illusion that we had actually hand painted a line picture. I decided again to use my watercolour pencils for this card, although I found it much easier to use actual watercolour paints for the water in the vase. I think that is the key - to use the different mediums in co-ordination with each other.

So here is my 'faking it' watercolour card…..hopefully it looks as though I have sat down with a blank canvas and hand painted the picture….


Quite impressed with this one even if I do say so myself!! Just completed my card for today which I;m super excited about - will photograph and post tomorrow before giving to my friend for her birthday on Friday!!

Any comments as always, so very much appreciated xxx

Sunday 11 May 2014

Watercolour class day 6 - card 2 A birthday card for a special little boy

Next Saturday will be my little boy's 3rd Birthday. I can't actually believe he is about to be that grown up! I think 3 means he is officially no longer a baby!!

I am so delighted that this class has allowed me to create such a full on technical card for him which he will hopefully love. He is such a cheeky little monkey and so it seems so fitting to have that as the character on his card. I was able to use my new pencils again, use the masking fluid and also use some traditional waterpaints.

This card did take me over an hour to create, but I am so pleased with the end results. I hope my little monkey will like it too.


I have just seen the inspiration photo at Inkspirational Challenges and it is a photo with balloons….


how fitting is that! I am therefore going to enter this card into the challenge. Huge congratulations to Carol for Just me C, who has just been made DT member there! xx


Any comments as always so very much appreciated. Really looking forward to tomorrow's lessons xx


Watercolour class day 6 - card 1 for a Wedding

I am LOVING the watercolour class and I am really beginning to find my way around and feel much more confident in the techniques. I watched the videos for day 6 and decided to go on a bit of a spending spree in Hobbycraft. Purchases today were:

Watercolour pencils (I'd been swithering whether to get these but decided to take the plunge)
Art board
Masking tape
Masking fluid
a waterbrush
white perfect pearls
A few new stamps…..
Lots of other bits and pieces!!

I created two cards today- one is to be a wedding card for my friend and the other a birthday card for my little boy who turns 3 next saturday.

This wedding card is actually an exact replica of the card we were shown in the class. Usually I try to put my own spin on the card techniques, but I decided that Jennifer Maguire's card was just SO prefect and so I wanted to just do the same. I got to use my brand new watercolour pencils and also the perfect pearls. As per Jennifer's card, instead of using water with the watercolours, I used a water/perfect pearls solution. This gives and AMAZING sheen to the flowers, but that is so hard to capture in the photos.


I do feel that this card needs a bit of bling added by way of a few pearls or crystals but I have refrained for now….I might add them in later though!!

I will keep the card for my little boy as a separate post.

Any comments as always, so very much appreciated xxx


Watercolour class day 5……full on water colouring today!!

Day 5 of the Online Watercolour for Card Makers class and we were focusing in colouring stamped images. One of the videos was just plain scary - it was taking a simple stamped image and turning it into what I would class a watercolour painting! It was stunning!! I decided not to shrink away from this and to tackle it head on. The ink used to stamp the image was distress ink which of course reacts with water in order to blend in with the other colours being used. I didn't have distress ink so had to just use pigment ink and so I'm not overly happy with the fact that the image can be seen too crisply. This was a first attempt at anything of this level. Whilst I'm not happy with the final image due to certain aspects - i'm please that the background blending looks pretty cool! I had also given my card a spray with gold perfect pearls which gives the card a lovely shimmer.

Here is the card anyway….


This is definitely a technique that I would like to try again. I actually found it quite therapeutic to sit painting it!

I really struggled to decide which sentiment I should have for this card, so I decided that for now, I would leave it sentiment free.

Any comments as always very much appreciated. Laura xx

I wouldn't normally enter two cards in to a challenge, but since this showcases the wonderful products of Uniko Studio, I am going to put it in their challenge as it matches the colours we are asked to use!


Thursday 8 May 2014

Watercolour class day 4 - more learning!!

Evening all,

I thought I would really quickly stop by with another card which I made today following the techniques shown on our Watercolour for Card makers class. There were three techniques today, but actually, I found I was really only able to do one of them because of the gaps in my supplies - I don't have any background stamps and although I have tried the third technique - I am kind of battling with what I have done in order to assemble the card!! I just can't quite get it right at all.

Anyway, here is my card for today, photographed in a slightly different location as I was short of time once again!! This is the first time in a very long time I have not added any embellishments of any kind to a card. I just really get that the image itself and the sentiment spoke volumes and nothing else was required - you may think differently mind due!!

Here's my card.


As you can see, there is a watercolour look created again!! I stamped the main dandelion image and then with the set I was using (Personal Impressions one), there were Dandelion stalks - I just inked the end of the stalks, sprayed them with water and stamped at the side of the main flower to give the look of the petals blowing in the wind.

This is a super simple card, but I am actually very pleased with it. Very different to my usual bling tactic cards, but it's good to try new things!

Any comments as always, really make my day Laura xxx

Watercolour day 3 attempt 2!!

So last night, I created a card using the watercolour technique Jennifer had shown by way of inking stamps, spraying them with water and then stamping them. The inks I used were not great, and I was feeling a bit down that my card just wasn't what I was wanting it to be. So, I decided to try again!! The problem I felt was that I had decided to use the card for a challenge that required specific colours and the expectation was that a certain brand of stamps were used. I felt that this tied me down too much and left me unable to achieve the result I wanted.

I decided to have a second try at it, this time using Memento Inks and using various brands of stamps. I decided to go with the same layout as Jennifer had, but of course adding my own twist to it. I also took her advice of planning the flower arrangement on a piece of scrap paper first and this worked a dream.

The Memento inks, instead of the Hobbycraft own brand ones, left me able to get the results I was really trying to achieve. I now have a card, that I am super pleased with. As always, I added bling by way of some pearls and a button and twine between my two sentiments. I would love to hear what you think - and if you agree that this is way better than my attempt last night!


My second card, follows the technique shown by Jennifer Maguire. An acrylic block was stamped with some embossing ink, watercolour paint was added to the edges of the block and then sprayed with loads of water. The block was then placed on a piece of watercolour paper and pressed down with a book on top for a minute or so. The block was removed and the excess paint/water dabbed up with a paper towel. Jennifer had shown us how to then print a stamp using distress inks - I of course don't have these and so I decided to see what would happen if i coloured my stamp with watercolour paints and then stamped the image - OMG - I was super impressed!!!! I covered the stamp in embossing ink first so the paint had something to adhere to and I stamped in two stages, the greenery first, dried it, cleaned my stamp, reined with embossing ink and then painted the petals in deep purple. I actually squealed with delight once I had printed the flowers!!! I then coloured in the stamped image by watering down the colours I had used for the stamping stage. I added a bit of deeper purple at the flower centres just to give a bit of depth to them. Once dried, it was a case of stamping the sentiment, adding a few crystals (can you tell I am sequin/crystals/pearls obsessed) and then I added this card to a backing card. Before this final stage however, I wasn't happy with the top right corner - there was too definite a line where the paint ended. I simply corrected this a bit (you can still see it a bit) by coming in with my paintbrush and just trying to blend it out a bit with some more matching paint.


As always, I would be delighted with any comments you wish to add.

Laura xxx


Watercolour day 3 attempt 1 & Uniko Studio challenge 9

Hello all,

It was day 3 of the watercolour class yesterday and yet more inspiration to be had. The first two days were focusing on watercolour backgrounds whereas yesterday was looking at stamping using watercolours. The first technique was so so simple (I thought!!) but yet so effective (Jennifer Rzasa made it look amazing!!)

The technique was to create watercolour look by quite simply inking up a stamp, spritzing it with water and then stamping the image on watercolour card. This gave such an amazing effect. I decided last night in a tight window of opportunity to create a card using this technique that I would enter in to the Uniko Studio Challenge. Jennifer had used Memento inks as she found them to work the best with this technique. Whilst I had 6 or so Memento inks, none matched the colours of the palette given for the Uniko Studio challenge.

I therefore had to make do with using a set of Hobbycraft's own stamps which had the advantage of being in a variety of colours. The Memento inks are water based and the Hobbycraft ones Pigment based, but I thought I would still give it a whirl anyway.

Since the theme at Uniko is Easter - to me, Easter not only means vast amounts of chocolate (yummy!!), but it also means lovely flowers - spring I guess would be the same. I therefore got out all my flower stamps from Uniko Studio (I have quite a collection now) and set about testing each one using this technique on a scrap bit watercolour card to assess how many times to spray it with water before committing it to the final card.

I have to say, some of these inks worked better than others.  I was not overly happy with the end results - this is purely down to the inks, and so I got out my watercolour paints and painted over each of the stamped images to give a softer feel to them. I found in particular the flowers from Flower power 1 were really hard to judge - with them 2 sprays left the image still to  lean cut, but 3 sprays of water totally smudged!! I decided to go for the two sprays and soften with a layer of water paints. The leaves from Nature's Treasures worked brilliantly though and didn;t need any amending. I covered a small piece of card stock using the various stamps and inks and then once painted and dry, I die cut a large heart out of my newly created water coloured patterned paper. I adhered this on to kraft card stock with some lemon thread behind it (loving this look just now) and added my sentiment. I needed this to be quite big to balance the card, so I decided to opt for Congratulations from All occasions sentiment 1 set. As always, I just had to add a bit of bling by way of three co-ordinating sequins, and some yellow crystals at the centres of the flowers.

This is a funny card - I like the idea of it, but I am a bit disheartened by the fact it never turned out the way I was hoping….I'm still not sure the watercolour paints have given the required effect I was looking for. I will definitely be remaking this card using the exact same stamps (which have been amazing) but using Memento inks…..Another lot of items to add to my ever expanding wish list.

I hope you like this card anyway, and as always, I am over the moon with any comments people leave.

Laura xx


Resources used:
Cardstock - kraft card by Jellybean, watercolour card by Daler-Rowney
Stamps - Flower Power 1, Nature's Treasures, All occasion Sentiments 1 (All Uniko Studio)
Embellishments - crystals by Anita's, Sequins by Hobbycraft, Thread from stash
Ink - Yellow, green and brown by hobby craft. Tuxedo Black by Memento (for sentiment)
Paints - Reeves